RecetteBook
🔍
Home
Explore
☰
Home
Explore Recipes
Favorites
Submit
Login
Log Out
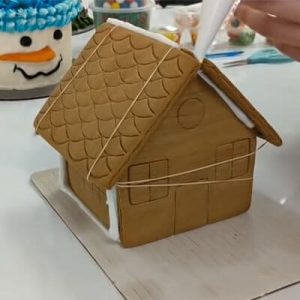
Gingerbread Sugar Shingles
❤️ Save to Favorites
Share:
Servings:
Author:
Total Time
1 hour, 45 minutes
Course:
Snack
Cuisine:
Germany
🧂 Ingredients
3 Cups
All-purpose flour
1 Teaspoon
Cocoa powder
4 Teaspoons
Ground ginger
1 Teaspoons
Ground cloves
2 Teaspoons
Ground Cinnamon
1 Teaspoon
Baking soda
1 Teaspoon
Salt
¼ Teaspoon
Black pepper
(fresh ground)
1 Cup
Unsalted butter
(room temperature)
½ + 2 Cup + Tablespoons
Granulated sugar
1 Large
Egg
½ Cup
Dark Molasses
2 Tablespoon
Corn syrup
(light)
1 Cup
Confectioner’s sugar
2 Tablespoon
Water
Save Selections
Instructions
1
Start with your dough in a small bowl and add your cinnamon, cloves, ginger,
baking soda, pepper, and salt. The next step will require a stand mixer to which
you add your butter use the paddle attachment for this. You want to beat the
butter on medium-high until it becomes light and creamy. Now you switch to
medium speed and slowly add the dry ingredients until everything is looking nice
and blended.
2
Use a spatula as needed to scrape down the sides and add your single egg into
this mix. Following this, you add the molasses and corn syrup to get a thick and
syrupy mixture. Don’t forget to scrape the sides of the mixer with a spatula.
This is when you can slowly start to add the flour using the slowest speed on
your mixer. Once the dough forms, it’s time to remove it from the mixing bowl
onto some plastic cling wrap.
3
Flatten the dough to make a 1-inch thick rectangle all around and fold this over
the remaining dough. This dough goes into your fridge to chill overnight.
4
The next day will be a baking day so preheat your oven to 350 degrees
Fahrenheit. You should grab a cookie sheet and add some silicone baking paper to
place into that sheet and set it aside. Now you need a silicone pastry matt
sprinkled with a little bit of flour on top. You can now unwrap your gingerbread
dough and place this onto the pastry mat. This should be rolled out so the dough
is about 1/3-inches thick.
5
Use the dull side of a butter knife and slice strips about 1-inch wide across
each side. Use a flat ruler to get an even distance between each cut. Now you
can slice individual pieces that are 2-inches long and transfer them to the
cookie tray. Give them a distance of 1-inch in between so they have room to rise
and bake. Another idea is to use a rectangle cookie stamp cutter
[https://www.google.hu/url?sa=i&url=https%3A%2F%2Fwww.pinterest.com%2Fpin%2F549791067005727072%2F&psig=AOvVaw34lXS28URRnFNMijTQG3wn&ust=1645712925367000&source=images&cd=vfe&ved=0CAkQjhxqFwoTCJCVnMCElvYCFQAAAAAdAAAAABAE] that
includes a stamped image if you decide to be very nostalgic.
6
You may need to repeat the rolling process again if you use a stamping cookie
cutter while you’ve placed your first batch into the oven for 7 to 15 minutes.
They should be golden brown along the sides and soft in the center. You can
finish off the remaining dough and begin your icing glaze. Use a small bowl to
mix your glaze until it gets nice and smooth.
7
Remove your first batch of cookies and place them onto a cooling rack for no
more than 10 minutes. Add a single glaze of icing onto the cookies while they
are still warm. It’s best to use a kitchen brush to apply the icing so it’s
evenly coated and allows them to cool. As the glaze dried, this will turn into a
shiny glaze that gives your cookies an appealing shine. These can be placed into
an airtight Tupperware that will last at least 2-weeks so they remain fresh.
×
Welcome to RecetteBook
Login or register to save recipes, leave comments, and more.
Login
Don't have an account?
Register here